This is the multi-page printable view of this section. .
Blog
- 1: How Hugo and Oink Integrate Giscus Comments
- 2: Installing a Custom Linux Kernel in a Virtual Machine
- 3: DNS Notes: Domain Lookups, Resource Records, and HTTPS Certificates
- 4: SSH Login and Security Hardening on Linux Servers
- 5: Building a Personal Site with Oink, from Setup to Publication
- 6: Migrating and Consolidating ROS Workspaces
Dated updates and reflections. The current posts are available in both Chinese and English; use the language switcher to read either version.
1 - How Hugo and Oink Integrate Giscus Comments
Hugo produces static HTML. It does not provide a server that accepts comments, a database, or a user system. Adding comments to a Hugo site with Oink therefore means delegating the comment interface to Giscus and storing the data in GitHub Discussions.
When I added comments to the site, I wanted one conversation for everyone—whether they opened the Chinese or English page, on Vercel or GitHub Pages. Here’s how the pieces work together to bring a comment onto a static blog page.

What the four components do
| Component | Responsibility |
|---|---|
| Hugo | Reads Markdown and configuration and generates blog pages |
| Oink | Provides page templates and decides when and where to output a comment container |
| Giscus | Displays the comment interface and communicates with GitHub |
| GitHub Discussions | Stores discussions, replies, identities, and reactions |
The relationship is:
Comment data always remains in GitHub Discussions. The blog embeds an entry point for viewing and posting Discussion content. The official Giscus documentation explains that Giscus uses the GitHub Discussions search API to find the discussion mapped to a page and creates one when a visitor first comments or reacts if none exists.
Why a static site needs an external comment backend
A conventional comment system needs at least this flow:
That normally means maintaining an application server, database, login system, permissions, and spam controls. Hugo only builds static files; it does not continuously run an application that handles those requests.
Giscus reuses GitHub’s existing services:
- GitHub accounts provide identity.
- GitHub Discussions store the main post, replies, and reactions.
- Giscus maps the current page to one Discussion and provides the embedded interface.
- Repository maintainers moderate, reply, pin, lock, or remove content in Discussions.
The site therefore needs neither a comment database nor a GitHub token in hugo.yml.
Why a Hugo parameter can control comments
Hugo lets a site define parameters in configuration or page front matter. For example:
To Hugo, this is simply a value. Oink’s templates give it meaning by reading site-level and page-level comment parameters and deciding whether to output the comment container and load Giscus.
Hugo’s front matter documentation explains that metadata at the top of a page can describe content and influence template selection and publication structure. This site keeps the full Giscus configuration in hugo.yml and uses section cascades to control where it appears:
- Blog articles inherit the global comment setting.
- The blog index explicitly sets
comments: false. - The home, learning, and experience sections do not display comments.
- Chinese and English versions of a blog post use the same discussion identifier.
This avoids repeating the entire Giscus configuration in every article.
What the Giscus configuration contains
The central configuration for this site is:
The four essential identifiers are:
| Setting | Purpose |
|---|---|
repo | Selects the public repository containing Discussions |
repoId | GitHub’s public unique identifier for that repository |
category | Selects the category for new discussions |
categoryId | GitHub’s public unique identifier for that category |
These are routing identifiers, not secrets or access tokens. The target repository must also be public, have Discussions enabled, and have the Giscus App installed. The official configurator recommends an Announcements-type category so only maintainers and Giscus can create new Discussions there.
The remaining settings control behavior:
reactionsEnabled: 1displays reactions on the main discussion post.emitMetadata: 0disables periodic Discussion metadata messages to the parent page.inputPosition: bottomputs the input box below existing comments.loading: lazydelays loading until the iframe is near the viewport.theme: autofollows the site’s light or dark mode.- Chinese pages use
zh-CN, while English pages useen. This changes the Giscus interface, not the language of user comments.
How the page loads comments
The process has a build phase and a browser phase.
Build phase
When Hugo builds a blog page, Oink checks the comment switch and required configuration. If the conditions pass, the template outputs a parameterized container similar to:
No comment data exists in the generated HTML. It only reserves a container and tells the browser which repository, category, and discussion identifier to use later.
Browser phase
After a visitor opens the page, Oink’s JavaScript dynamically loads:
Giscus then creates an iframe. It appears at the bottom of the blog, but technically comes from an independent page served by giscus.app:
The iframe isolates the comment application from the blog page. Oink also watches the site’s color mode and uses browser postMessage events to send theme changes to the Giscus iframe.
If the script or iframe fails to load, Oink exits the loading state and displays a localized error message instead of leaving the page waiting indefinitely.
How one article maps to one Discussion
Giscus needs to know which Discussion belongs to the current page. Available mappings include the full URL, pathname, the page title, and a specific string.
A single-language site on one domain can often use:
Different paths then normally create different discussions. This site, however, has Chinese and English content on two deployments:
Using the browser pathname directly would split one article across several Discussions. The site therefore uses:
A Hugo template derives a common data-term from .Page.Path:
Hugo’s Page.Path documentation states that the logical path excludes file extensions and language identifiers. Removing deployment domains and the GitHub Pages base path gives all four entry points the same identifier:
The title may be translated and the domain may change while the comment thread remains stable. Changing the article slug changes this identifier, so a slug change should preserve the old term or include a deliberate Discussion migration plan.
How comments are created and moderated
After loading, Giscus searches the configured repository and category with the mapping term:
- If a match exists, it fetches and displays the existing comments.
- If no match exists, it initially displays an empty comment section.
- The first comment or reaction causes Giscus Bot to create the Discussion.
- A visitor authorizes Giscus through GitHub OAuth to post on their behalf.
- The site owner moderates content in GitHub Discussions.
Visitors may also participate directly in the GitHub Discussion. Both interfaces operate on the same data.
Summary
Giscus does not copy comments into Hugo. It embeds a GitHub Discussion in the blog: Hugo generates the page, Oink decides whether to load comments and passes the configuration, Giscus provides the interface and communication layer, and GitHub Discussions persists identities and data.
For a simple site, pathname may be enough. For a bilingual site with two deployments, the important design choice is a stable identifier independent of language and domain. This site uses specific + /blog/<slug>/ so every version of the same article shares one comment thread.
2 - Installing a Custom Linux Kernel in a Virtual Machine
This article has one goal: compile and install a custom kernel in Ubuntu running inside VMware, then load a .ko module I wrote myself.
Compilation and kernel replacement both happen in that virtual machine. They consume CPU, memory, and disk space and involve GRUB. Unstable networking can interrupt long builds or SSH sessions; without booting the new kernel, the module will not match the running version. The order is therefore static IP first, custom kernel second, and module last.
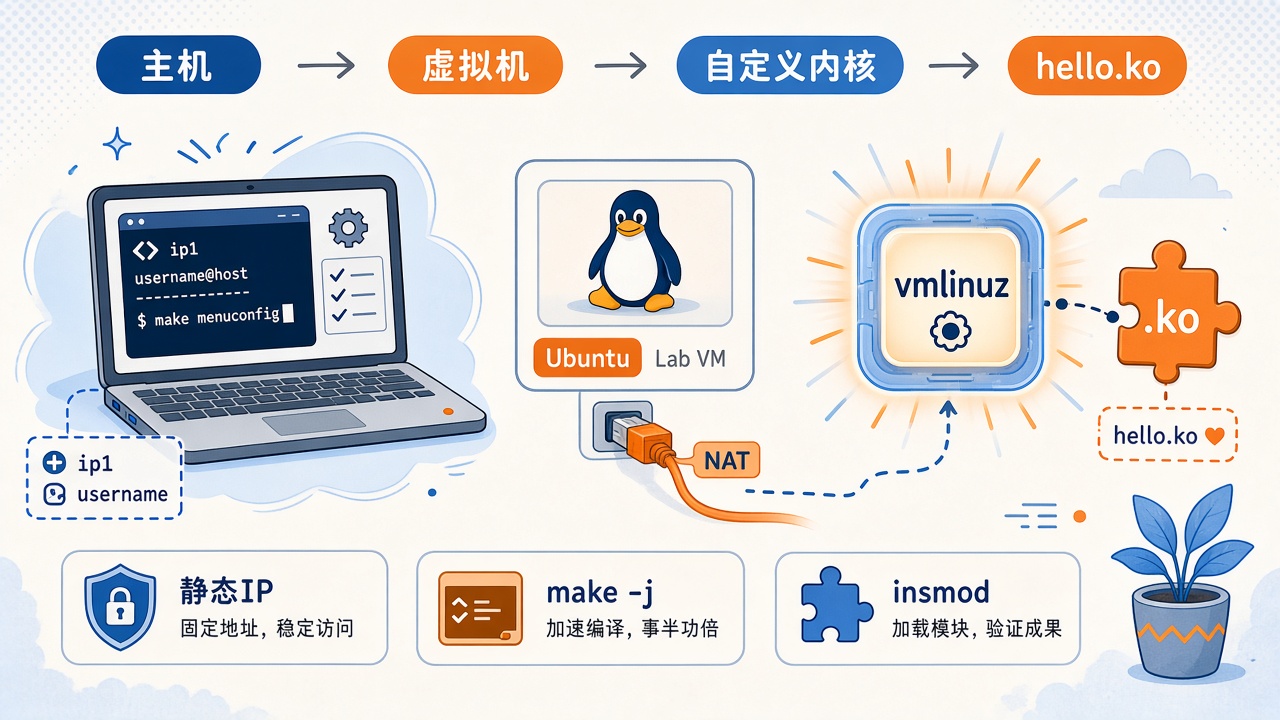
ip1 is the host’s address on VMnet8, ip2 is the NAT gateway, and ip3 is the virtual machine’s static address. These and username are placeholders. Use the actual subnet shown in your Virtual Network Editor.
Why compile the kernel in a virtual machine?
The kernel is the innermost operating-system layer, managing CPU, memory, disks, network adapters, and process scheduling. Terminals, browsers, and apt run in user space. They cannot directly access hardware and instead ask the kernel through system calls such as read, write, and mmap.
| Layer | Examples | Access |
|---|---|---|
| User space | bash, browsers, Python | No direct hardware access |
| Kernel | vmlinuz, scheduler, drivers | The layer that directly operates hardware |
| Hardware | CPU, memory, network adapters, disks | — |
uname -r prints the currently running kernel version. A later .ko build must use headers and an ABI matching that kernel, so booting the custom kernel first is not optional in this experiment.
My host runs Windows. Although I have also installed Ubuntu in a dual-boot setup, replacing its kernel could affect existing software dependencies. I therefore created a separate VMware machine for this experiment. Builds still consume disk space and time, but snapshots provide a way back without experimenting on my everyday environment. First, give this machine a static IP so DHCP address changes do not interrupt SSH during a long build.
Configuring a static IP for the virtual machine
VMware’s VMnet8 uses NAT by default: the virtual machine accesses the network through the host. A network adapter can communicate directly only with devices on its own subnet; traffic outside it goes through the default gateway. The path is:
Record the VMnet8 subnet and gateway
Open Virtual Network Editor and select VMnet8:
| Field | Meaning | Placeholder here |
|---|---|---|
| Subnet IP | NAT subnet, such as x.x.x.0 | The subnet itself |
| Gateway IP | Virtual network gateway, usually .2 | ip2 |
Then check Windows: Control Panel → Network and Sharing Center → Change adapter settings → VMware Network Adapter VMnet8. The host’s address on this network is usually .1, called ip1 here.
| Adapter | Purpose |
|---|---|
| VMnet0 | Bridged networking into the physical LAN; usually no subnet is assigned in the editor |
| VMnet1 | Host-only; DHCP is available by default, without Internet access |
| VMnet8 | NAT; virtual machines access external networks through the host |
If you use ip1, the host, as the gateway instead of ip2, the NAT gateway, a common symptom is being able to ping Windows but not reach the Internet.
Configure static IPv4 in Ubuntu
Settings → Network → IPv4 → Manual:
- Address:
ip3, on the same subnet; avoid.0,ip1,ip2, and the DHCP pool. - Netmask:
255.255.255.0, a 24-bit prefix. - Gateway:
ip2. - DNS: use a public resolver such as
8.8.8.8or223.5.5.5. This specifies the domain-name resolver, not your machine’s IP.
Open a new terminal and check:
The output should include ip3. The lab machine now has a fixed address for the hours-long kernel build.
Compiling and installing a custom kernel
A kernel does not have to be one giant binary. Features can be built in, [*]; built as modules, [M], producing .ko files loaded when needed; or omitted, [ ]. Use lsmod to view loaded modules.
Prepare the source and .config
Check the current kernel and select a nearby version from kernel.org. The example uses 5.15.221: if uname -r shows 5.15.0-139-generic, choosing 5.15.x is simpler than jumping across major versions.
| tar option | Meaning |
|---|---|
-J | xz compression |
-x | Extract |
-v | List filenames |
-f | The archive filename follows |
make olddefconfig supplies defaults for new options in an existing .config without an interactive questionnaire. It only updates the configuration; it does not compile the kernel.
The upstream kernel.org source does not include Ubuntu’s two certificate files. Clear their paths so the configuration does not point to nonexistent files:
| Option | Original purpose |
|---|---|
CONFIG_SYSTEM_TRUSTED_KEYS | Build trusted CA certificates into the kernel for module-signature verification and related uses |
CONFIG_SYSTEM_REVOCATION_KEYS | Build revoked certificates into the kernel |
To confirm that you booted your own build, add this line near the start of start_kernel() in init/main.c. Line numbers vary by version.
Compilation and disk space
The first build takes a long time. Ensure the virtual machine has enough CPU cores, memory, and free disk space. Check space first:
My observations:
| Configuration | Disk space |
|---|---|
| Keep default debug information | A 40G virtual disk was insufficient |
| Disable debug information before rebuilding | About 30G was enough to finish |
If space is insufficient, disable debug information and run make olddefconfig again:
Then build, keeping -j at or below the virtual machine’s CPU-core count:
The source root should contain modules.order after the modules finish building. GCC’s role here is straightforward: compile .c source into machine code for the kernel and its modules.
Expanding a disk after it fills up
If compilation fills the root partition, do not immediately shut down to expand the virtual disk. Shutting down with no free system space may leave Ubuntu unable to reach the desktop, with a black screen.
While you can still access the system, free some space first, for example by removing temporary files or incomplete build artifacts. Then shut down and enlarge the disk in VMware settings. Expanding the disk only increases the .vmdk; the guest sees the extra capacity as unallocated space. A partitioning tool must add it to the filesystem.
- If Ubuntu still boots, install and open GParted and extend the root partition into the unallocated space.
- If the screen is already black and the system will not boot, start from an Ubuntu installation image, choose Try Ubuntu, and use GParted in the live environment to extend the root partition into the new unallocated space.
Free space first, shut down second, and expand the virtual disk third. Expanding only after shutting down a full system commonly leaves it unbootable, requiring Try Ubuntu from a live USB or image.
Install, update GRUB, and verify
After rebooting, the new kernel should be available. Following make install, GRUB’s first entry is usually the newly compiled version.
To enter BIOS and change boot settings, power off the virtual machine and append bios.forceSetupOnce = "TRUE" to its .vmx. This is a one-time setting reset to FALSE after boot. If Windows hides extensions, use File Explorer → View → Show → File name extensions.
The custom printk message should appear in the kernel log. Check:
This stage is complete only when uname -r shows 5.15.221, or your chosen version, and dmesg contains the Hello message. The module below uses uname -r to locate /lib/modules/…/build, so reach this point before proceeding.
Writing and loading a kernel module
A module runs inside the kernel without requiring a rebuild of the entire kernel. insmod loads it into the currently running kernel, so use the kernel’s Kbuild system rather than gcc hello.c -o hello. The build tree is /lib/modules/$(uname -r)/build.
Source and Makefile
Create hello_module.c in a clean directory:
Copying from a web page can introduce non-breaking spaces, NBSP. gcc may treat a trailing NBSP on an #include line as an extra token or report a leading NBSP as stray '\302'. Use ordinary spaces.
Create a Makefile in the same directory. Recipe lines must start with a Tab, not spaces.
| Fragment | Meaning |
|---|---|
obj-m | Build a .ko module: m means module, while obj-y builds into vmlinuz |
-C .../build | Enter Kbuild for the currently running kernel |
M=$(PWD) | Module source is in the current directory, outside the kernel tree |
$(shell uname -r) | Automatically match the version installed in the previous section |
Load and unload
A successful load produces Hello, Kernel! in the log, and unloading produces Goodbye, Kernel!. The Entering directory line in the build log should point to the kernel source/build installed above, not another build tree supplied by the distribution.
Summary
| Step | Result | Why the next step needs it |
|---|---|---|
| VMnet8 static IP | Fixed ip3 with working NAT Internet access | The address stays stable during long builds and SSH sessions |
| Successful custom-kernel installation | uname -r shows your own build | Modules must match the running kernel’s ABI |
hello_module.ko and insmod | Hello appears in dmesg | Confirms that the complete kernel-and-module experiment works |
If insmod fails next time, first check uname -r and ls /lib/modules/$(uname -r)/build. Confirm that you are not still running the distribution kernel and that the Makefile points to the correct build tree.
3 - DNS Notes: Domain Lookups, Resource Records, and HTTPS Certificates
When connecting a personal site to a custom domain, the console presents CNAME, A, and sometimes TXT records. These notes follow the process from the browser finding an IP address, through the purpose of each record type, to the point where HTTPS certificates enter the chain.
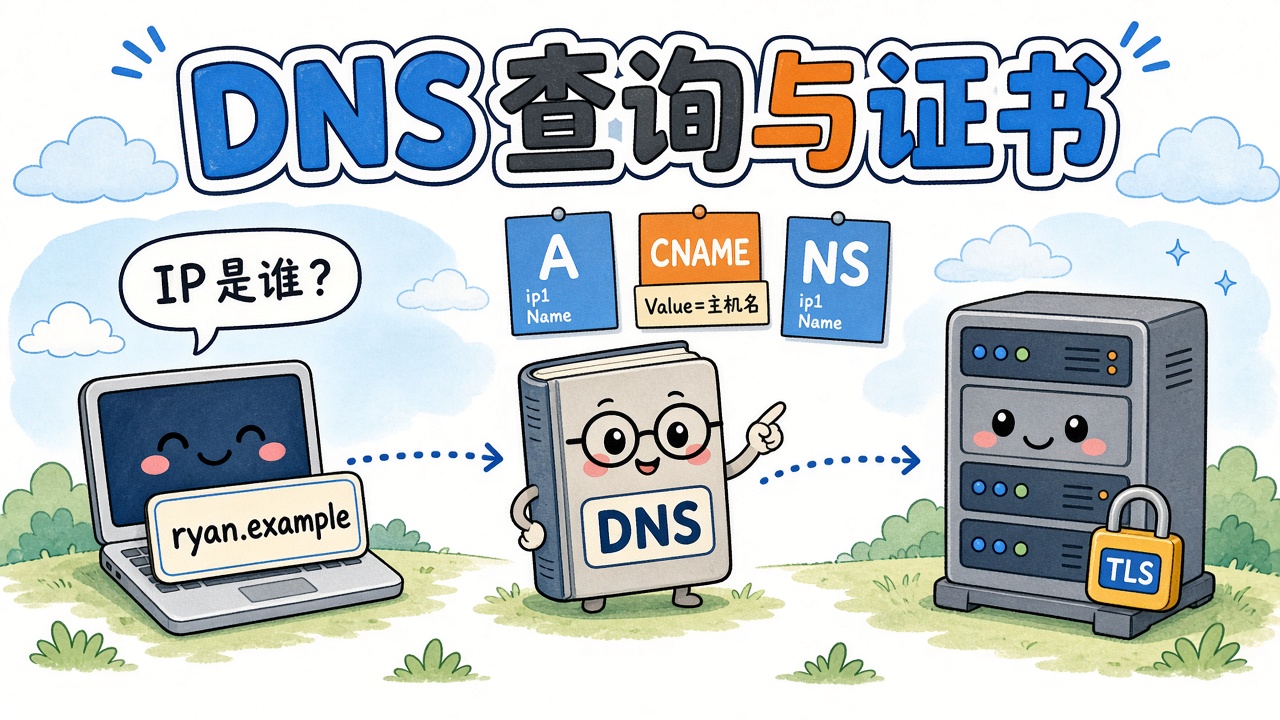
0412.online and ryan.0412.online are this site’s public domains. The CNAME target, verification string, and mail hostname are illustrative.
What DNS does
DNS translates domain names: people remember ryan.0412.online, while machines connect to an IP address.
When a browser opens a URL, roughly:
- It checks the local cache and uses a cached answer if available.
- Otherwise, it asks the DNS server configured locally, a recursive resolver.
- That server queries the global hierarchy until an authoritative server supplies the record.
The configured DNS service performs the recursive lookup. It may be your ISP, 1.1.1.1, your router, or a service run locally by proxy software. Answers are cached for a period specified by the TTL, so changing a record does not update the entire world immediately.
Where local DNS settings come from:
- Automatic: DHCP supplies them when you connect to Wi-Fi or Ethernet, often pointing to your ISP or router.
- Manual: a resolver address is entered in the network adapter’s IPv4 settings.
- Proxy / VPN: some software points system DNS at loopback and performs lookups locally. Like Git using a local proxy port, the request first goes through another program.
Resource records: an entry in the ledger
A Resource Record (RR) is a rule in authoritative DNS: a name, a type, a value, and a cache lifetime.
| Field | Meaning | Example |
|---|---|---|
| Hostname / Name | Which name the rule applies to | @ for the apex, www, ryan |
| Type | Kind of record | A, CNAME, NS, etc. |
| TTL | How long others may cache it | 600 = 10 minutes |
| Value | What it points to | An IP address or another hostname |
The value’s meaning depends on the type. A / AAAA / CNAME are most relevant to opening websites. NS / SOA / MX / TXT govern zone ownership, mail, and verification; browsers usually do not read the latter types when requesting a page.
A / AAAA / CNAME
A: name → IPv4
An A record identifies the IPv4 address for a name. When connecting the apex domain, 0412.online, to Vercel, the console often asks for an A record because many DNS panels do not permit CNAME at the apex.
The limitation is that an IP change requires a record update. Subdomains more commonly use CNAME, leaving the cloud provider to update the target’s IP.
AAAA: name → IPv6
The same idea as A, but for IPv6. Dual-stack sites often have both A and AAAA records.
CNAME: name → another name
CNAME means Canonical Name, or an alias. It does not supply an IP; it tells the resolver to look up another name instead.
Resolution proceeds as follows:
- Query
ryan.0412.online→ receive a CNAME → the DNS target hostname assigned by Vercel. - Query that hostname → receive A/AAAA records → obtain an IP.
- The browser connects to that IP while still using your domain in TLS/HTTP.
Remember: Name is your label; Value is the hostname assigned by the other provider for DNS to locate the machine. It is usually not xxx.vercel.app, which people open in a browser, but the hashed ….vercel-dns-017.com. target shown in the console.
Key points:
- Value must be a hostname, not an IP. Use A for an IPv4 address.
- The trailing
.marks a fully qualified name so that your suffix is not appended again. - A name with a CNAME generally cannot also have A, MX, or TXT records.
- The hash prefix is a project-specific identifier. It belongs to your Vercel project: do not copy the public
cname.vercel-dns.comfrom a tutorial or another project’s hash.
NS / SOA / MX / TXT
These four do not supply the website’s destination address. Web access uses A/CNAME.
NS: who answers for this zone?
Name Server records point not to the website but to the provider authorized to answer questions for the zone: where the ledger is kept.
After buying 0412.online, you may see:
This means DNSPod / Tencent Cloud DNS supplies the authoritative A and CNAME records. Changing DNS providers means changing NS, not changing each A record. If NS points elsewhere, editing CNAME in the old panel has no effect.
SOA: the ledger’s cover page
Start of Authority. Each zone has one, containing its primary DNS server, administrator email, serial number, and refresh interval. The panel generates it automatically; adding a website does not require editing it manually.
MX: where mail goes
Mail Exchanger. It is queried when mail is sent to an address such as xxx@0412.online; opening a website does not use MX.
The number is the priority: lower values are preferred. A/CNAME for a website and MX for mail can coexist, subject to the CNAME restriction. A domain without hosted email can have no MX and still serve a website.
That restriction is another reason to avoid CNAME at the apex: the same name cannot also hold MX records. Using CNAME for the ryan.0412.online subdomain avoids this issue.
TXT: a note for machines
A TXT value is plain text, ignored by the browser when fetching a page. It can let another company confirm that you control the domain.
For example, a platform may ask you to add:
The platform checks the string in authoritative DNS and allows the domain to be attached to your project only if it matches. Otherwise, anyone could type someone else’s domain into their console.
Email anti-spoofing mechanisms such as SPF also use TXT and likewise do not supply a website’s address.
How TLS certificates fit in
DNS answers “which machine?” TLS certificates help establish “does this machine really represent this name?” and TLS protects the connection against eavesdropping.
The certificates discussed here are issued for domain names, not an IP. The browser checks the name in the address bar. Many Vercel sites share an IP, and the hostname in the handshake, SNI, selects the appropriate certificate.
Certificate issuance often involves DNS. Two common validation methods are:
| Method | What the CA does | Records involved |
|---|---|---|
| HTTP-01 | Visits http://你的域名/.well-known/acme-challenge/..., substituting your domain | A/CNAME must already point to a machine that can answer |
| DNS-01 | Queries a TXT record at _acme-challenge.… | TXT |
After connecting the domain to Vercel, the platform usually manages certificate requests. You rarely add _acme-challenge yourself. The verification TXT commonly shown in the console lets Vercel verify domain ownership; it is not the same record as a CA challenge.
Summary
| Role | Mechanism |
|---|---|
| Find the authoritative ledger | NS |
| Locate the website | A / AAAA / CNAME |
| CNAME Value | Provider-assigned DNS target hostname, possibly including a project hash |
| MX | |
| Prove domain ownership | TXT |
| Padlock / HTTPS | TLS certificate, after DNS has found the IP |
When filling in a CNAME: put your host label, such as ryan, in Name; copy the complete Value from Vercel’s domain page. Do not invent it or enter an IP.
4 - SSH Login and Security Hardening on Linux Servers
My recent SSH experiments on a VPS involved public-network timeouts, private-key permission errors, and port changes that systemd did not pick up. This article combines several Obsidian notes in the order of getting connected, hardening access, and coordinating firewall rules.
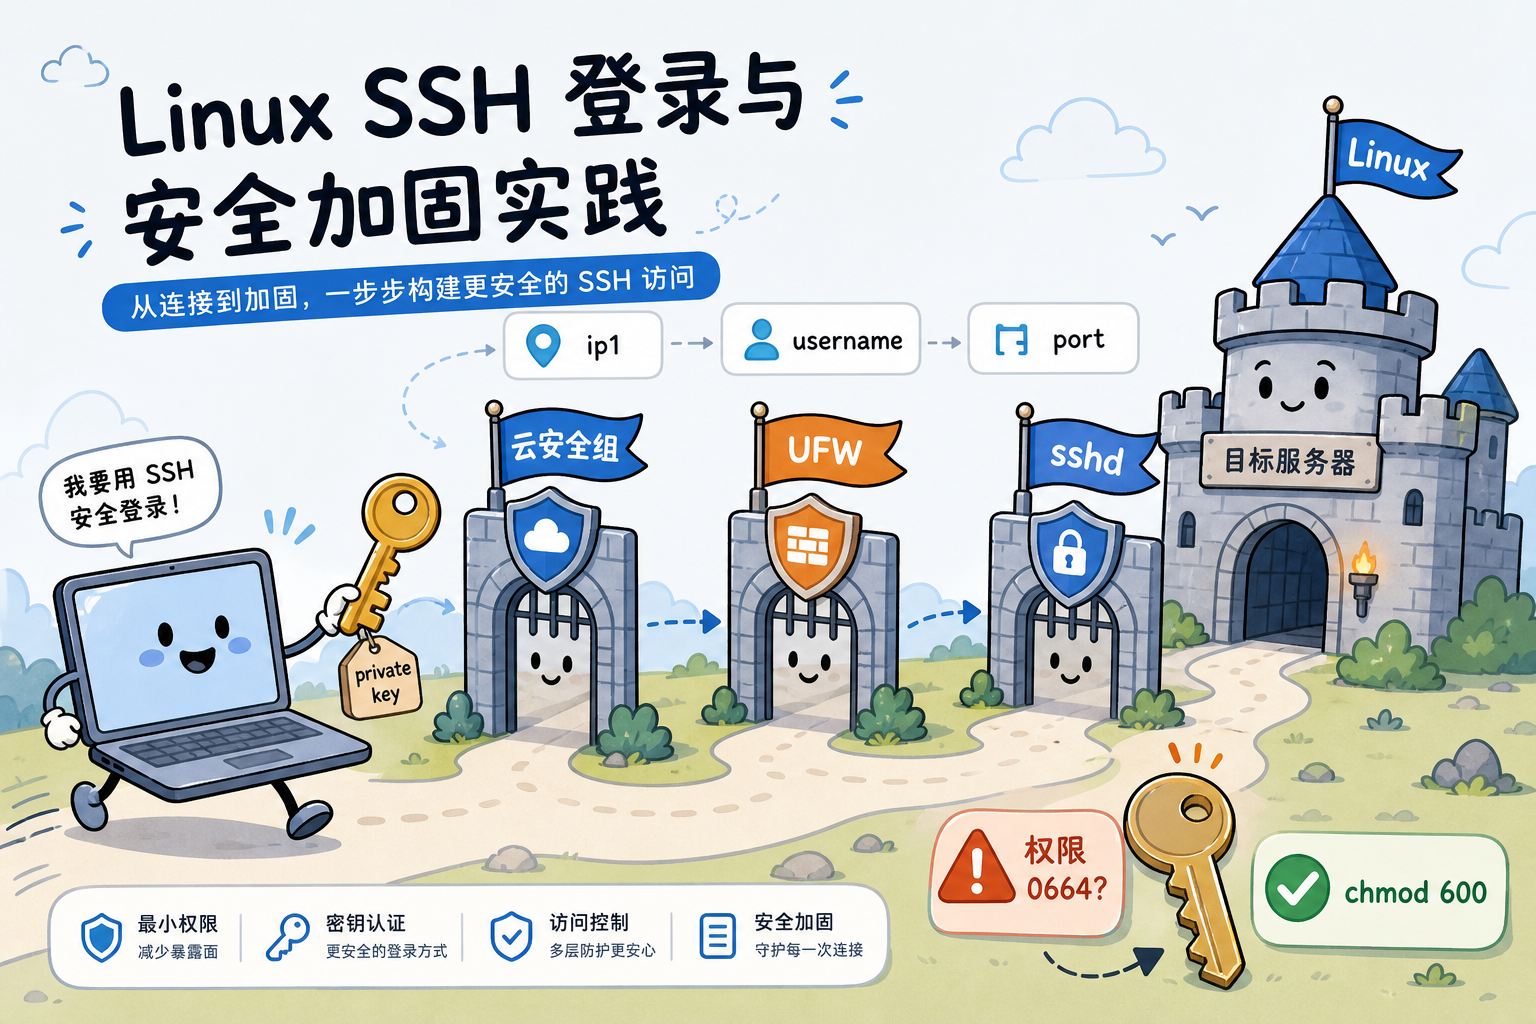
IPs are represented by ip1, ip2, and similar placeholders, for example ip1 for the server and ip2 for an allowed source. The domain xxx.xxx.com, ports such as 22222, and username are also example placeholders, not a real environment. Replace them with your own values.
The four elements of SSH login
Think of remote login in terms of four values:
| Element | Meaning | Common default |
|---|---|---|
| IP / hostname | A publicly reachable address | Scanners probe address ranges at random; it cannot truly be hidden |
| Port | TCP port | 22 |
| Username | Login account | Often root |
| Credentials | Password or key | There is no default password; keys require a local private key and a server-side public key |
Hardening can change the port, username, and authentication method. A common combination is keys instead of passwords, no root login, and a non-22 port.
Connection failures: timeouts and troubleshooting
A typical error:
Possible causes:
- SSH is not on port 22 — Specify
-p <PORT>. - The cloud security group does not allow the connection — Allow your IP or source range in the provider’s console.
- A VPN or jump host is required first — Internal servers often cannot be reached directly over SSH from a dormitory or home connection. Connect to the VPN or jump host first, then
sshto the target.
Confirm both the port and the username.
The public-network path is roughly cloud security group → local firewall (UFW) → sshd. A block at any layer can produce a timeout or rejection.
A pitfall: overly permissive private keys
OpenSSH can refuse to load a private key before login even begins:
Cause: permissions 0664 allow the group and other users to read the private key. OpenSSH treats that as a potential exposure and refuses to use the key rather than risk it. This login therefore has no usable private key.
Fix: restrict access to the owner, tightening the directory permissions if needed:
| Path | Suggested permissions |
|---|---|
~/.ssh/ | 700 |
| Private key | 600 |
Public key *.pub | 644 is usually acceptable |
Server-side ~/.ssh/authorized_keys | 600 |
Public keys uploaded to the VPS should not have an extra suffix such as .txt; rename them if necessary. The notes also recommend chmod 600 for the server-side public-key file.
Changing the SSH port with systemd and UFW
A cautious order: add the new port first, verify it, and only then remove the old one.
- Append a new
Portinsshd_config, keeping the old port temporarily. - Run
daemon-reloadand restartssh.socket/ssh.service. - Check the new listening port with
sshd -Tandss. - Allow the new port in UFW and the cloud security group.
- Open a new terminal and try connecting through the new port.
- After confirming access, remove the old rules and close port 22.
Editing the sshd configuration
Add a line, for example adding 9753 alongside the existing 22222:
sshd_config configures the sshd server: listening ports, root login, password authentication, and more. In nano, use Ctrl+O to save and Ctrl+X to exit.
Why Ubuntu also needs ssh.socket updated
Ubuntu often uses systemd socket activation for SSH: ssh.socket listens first, then hands the socket to sshd in ssh.service. Editing sshd_config alone is not enough; the generator must update the socket configuration with the new ports:
| Action | Configuration on disk | Unit in memory | Kernel LISTEN socket |
|---|---|---|---|
Only change Port 9753 | New | Old | Old |
daemon-reload | New | New; generator updated | May still be old |
restart ssh.socket | New | New | New; bind recreated |
Check which ports the configuration says should listen:
Check which ports the system actually listens on:
ss -tlnp selects TCP, listening sockets, numeric ports, and process information. Remember: listening locally does not mean reachable publicly. UFW and the security group also matter.
Allowing the new port in UFW
UFW is Ubuntu’s firewall frontend. Traffic passes through:
Check the status:
inactive: UFW is disabled; only the security group and sshd apply.active: incoming traffic is filtered according to the rules.
Interpreting the output:
| Column | Meaning |
|---|---|
| To | Port exposed on this server |
| Action | ALLOW permits traffic; DENY / REJECT blocks it |
| From | Anywhere means any IP; rules can instead allow only your home IP |
Allow the new port:
9753/tcp ALLOW IN means the rule is present. Common maintenance commands:
Users, root restrictions, and key-based login
- Create a non-root user — Use
sudo adduser username. On Debian/Ubuntu, install sudo withapt install sudoif needed and configure sudo-group access usingvisudo. Follow least privilege rather than assigningNOPASSWDeverywhere. - Disable root SSH login — Set
PermitRootLogin noinsshd_config. - Use keys and disable passwords — Generate a key pair locally, preferably Ed25519, avoiding DSA; see the next section for ECDSA/Ed25519 notes. Put the public key in the server’s
~/.ssh/authorized_keys, and set:PubkeyAuthentication yesPasswordAuthentication no
Reload or restart after configuration changes, and keep an already authenticated session open so that you do not lock yourself out.
A brief guide to key algorithms
| Type | Notes |
|---|---|
| RSA | Common, with longer keys; usable but not the only choice |
| DSA | No longer secure; do not use it |
| ECDSA | Short and fast; the algorithm has attracted more debate |
| Ed25519 | One modern default recommendation, with public documentation and good performance |
systemd and SSH: two units
systemd is the init and service manager, PID 1, on most modern distributions. For SSH:
- ssh.service runs the
/usr/sbin/sshdprocess. - ssh.socket lets systemd listen first and activate the service, known as socket activation.
A simplified relationship:
Unit files live under /usr/lib/systemd/system/ for package definitions and /etc/systemd/system/ for local overrides. systemctl cat ssh.service shows the combined definition. For port changes, remember that Ubuntu needs a reload and a socket restart, not just systemctl restart ssh.
Summary
| Stage | Key points |
|---|---|
| Cannot connect | Check the port, security group, and VPN/jump host; all three layers must allow traffic |
| Private-key errors | Use chmod 600 for the private key and 700 for .ssh; OpenSSH rejects overly open keys |
| Port changes | Add before removing; verify with sshd -T and ss; update UFW and the security group together |
| Hardening | Non-root users, disabled root login, key authentication, and a non-default port |
These are learning notes, not a production checklist. Practice on a test machine first, and always retain a login path that will not leave you locked out.
5 - Building a Personal Site with Oink, from Setup to Publication
The official Oink tutorial is comprehensive, but connecting the folders, configuration, and commands can still be confusing the first time, especially without much frontend experience. These notes from building YHY Study Website follow one path: understand Oink, learn how content/ is organized, and then write and publish a blog post.

What Hugo and Oink each do
Hugo is a static site generator: it reads Markdown and configuration and produces HTML. Oink is a Hugo theme: it controls the appearance of sidebars, cards, callouts, code blocks, and other components.
Content and appearance are maintained separately:
- Site repository (
my-project-docs): Markdown articles andhugo.ymlconfiguration - Theme repository, github.com/pgsty/oink: templates and styles
The site declares the Oink theme in hugo.yml, and go.mod pins its version, currently v0.6.0. When you run hugo server, Hugo:
- Reads articles and configuration from the site repository.
- Reads templates and styles from the theme module downloaded according to
go.mod. - Renders the content with the theme to generate web pages.
When writing documentation rather than changing the theme, hugo server is enough to remember. You do not need to start with make dev.
Local preview: get the site running first
Enter the project directory and start the server:
Open http://localhost:1313/ in a browser. Saving a changed .md file under content/ automatically refreshes the page.
For a more complete rerender after each change, useful when investigating styling problems:
-DFE: includes draft and future-dated pages for writing.--disableFastRender: disables fast rendering to avoid discrepancies caused by incremental updates.
Organizing content/
Oink does not maintain a separate navigation database: the folder structure on disk determines both the sidebar structure and URL paths.
Three common concepts:
| Concept | Meaning |
|---|---|
| Section | A folder with _index.md; this level also has its own entry page |
| Page | A .md file in a folder, or index.md in a subfolder |
| Sibling | Pages in the same directory, ordered with weight: 10/20/30… |
The root content structure of this site:
Two ways to store an article:
| Format | Example path | Suitable for |
|---|---|---|
| Single file | content/blog/my-post.md | Text posts with images stored in static/ |
| Page bundle | content/blog/my-post/index.md plus images in the same directory | Posts with multiple images kept beside the text |
The first hugo.yml keys to learn
You do not need to read the whole configuration at once. Start with these fields:
| Key | Purpose |
|---|---|
title | Site name shown in browser tabs, the navbar, and elsewhere |
params.productionURL + baseURL | Full production address; affects sitemaps, RSS, and absolute links |
params.github_repo | Content repository used by buttons such as “Edit this page” |
params.copyright | Footer copyright information |
languages.zh.menus.main | Navbar menus: Experience, Learning, Blog, and Links |
baseURL is often tied to productionURL with a YAML anchor:
&productionURL defines the name; *productionURL references it. Changing one value updates the whole site.
Writing a blog post in five steps
- Choose a filename — Create a
.mdfile undercontent/blog/. Its filename becomes part of the URL, so use an English slug, such asoink-site-setup-notes.md→/blog/oink-site-setup-notes/. - Add front matter — Metadata at the top should include at least
title,date, anddescription.linkTitleis the shorter title displayed in lists and cards. - Write the body — Adjust syntax copied from Obsidian, as explained below. Add callouts, step lists, heading anchors, and images as needed.
- Preview locally — Run
hugo serverand open/blog/to check the card and article page. - Publish —
git add→git commit→git push; GitHub Actions builds and updates GitHub Pages.
A front matter template:
Moving from Obsidian to Oink: syntax comparison
| Obsidian | Oink / Markdown | What to do |
|---|---|---|
==highlight== | **bold** | Replace throughout |
[[wikilink]] | [text](/path/) or an external link | Use an actual link |
Image ![[x.png]] |  | See below |
Common Oink components are described in the component documentation:
Callouts
Step lists — Start each item with 1. and add {.steps} at the end, as in the five steps above.
Heading anchors — Use ## Section {#id}. The {#id} is not displayed and supports in-page links such as [text](#id).
Images and captions — Put {caption="..."} on the next line after the image, not on the same line as :
- Global images go in
static/images/...and are referenced as/images/.... - Page-bundle images sit beside
index.mdand use relative paths.
Four make commands for theme development
The four commands in Makefile are aliases. Windows often has no make, and make dev / make check require the theme source at ../oink.
| Command | Theme source | Suitable for |
|---|---|---|
make dev | Local ../oink | Quick previews while changing the theme |
make check | Local ../oink | Running npm test after theme changes |
make build | Version pinned in go.mod | Production builds matching the deployed site |
make serve | Version pinned in go.mod | Local previews with production configuration |
When only editing content, use the PowerShell equivalents:
| Goal | PowerShell |
|---|---|
| Everyday preview | hugo server |
| Production build | hugo --cleanDestinationDir --minify |
| Preview close to production | hugo server --environment production --minify |
dev prioritizes fast visual feedback; check takes longer and runs automated tests. When changing the theme, first get the result right with dev, then pass check.
Publishing: three Git steps
After confirming the local preview:
git add: selects files for this commit. Specify the exact path when committing only the blog post; usegit add -Ato stage everything.git commit: creates a local snapshot.git push: sends it to GitHub and triggers Actions deployment.
The order is add → commit → push.
Summary
The main idea is: Hugo generates pages, Oink controls their appearance, and the content/ folders form the navigation tree. Writing a blog post means adding front matter and Markdown, previewing with hugo server, and pushing. Put {caption=...} on its own line, and convert Obsidian’s == and [[links]] to standard Markdown before publishing.
For a more systematic introduction, read chapters 1–3 of the Oink tutorial book. This site’s RAICOM documentation is a writing example in Chinese.
6 - Migrating and Consolidating ROS Workspaces
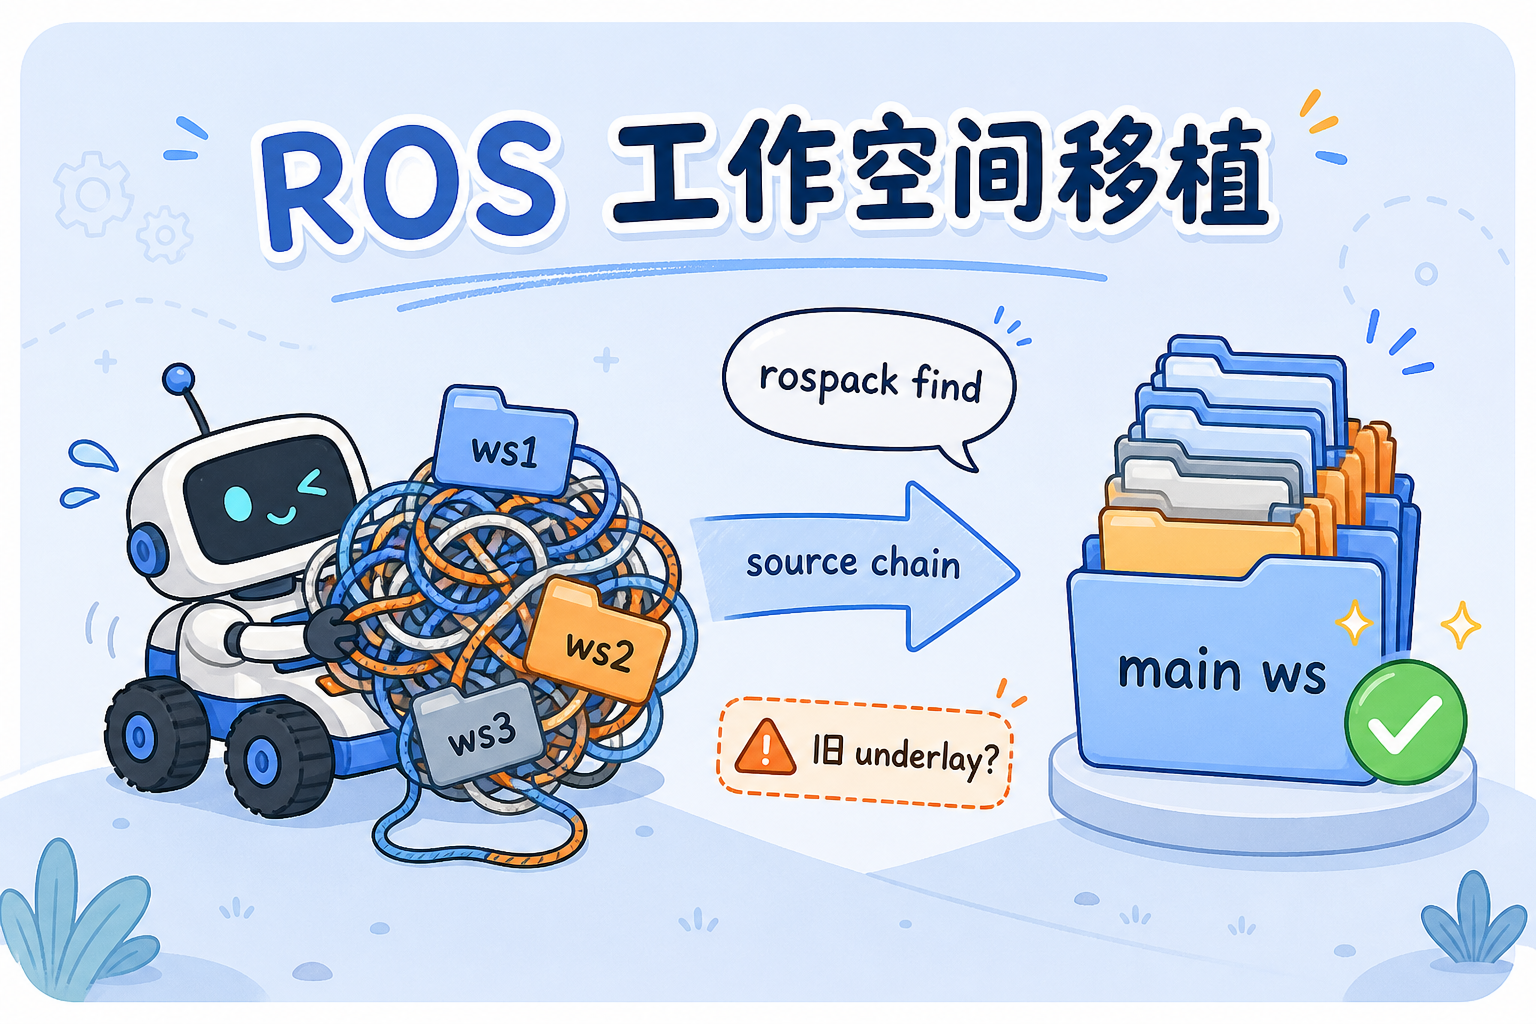
When moving a ROS robot to a new computer or disk, or sharing one codebase across several robots, the easiest trap is not copying the files: it is leaving the old workspace source chain in the shell. When several catkin workspaces overlap on the same machine, especially with identically named packages, you may not discover which copy is actually running until something fails.
These are my notes from consolidating and migrating workspaces: understand how catkin finds packages, simplify the source chain in order, and finally restore hardware bindings such as udev rules.
Why consolidate the workspaces?
Typical situations include:
- One robot overlays a main workspace, cartographer_ws, cv_bridge_ws, and other workspaces.
- Different directories contain packages with the same name, such as several copies of
mw_multi. .bashrc, startup scripts, and even a one-offexport ROS_PACKAGE_PATH=...each define their own environment.
Without a deliberate cleanup, the code may compile and the launch file may start while an old package path is still used. My goal is simple: keep one main source chain, extend it with auxiliary workspaces only when needed, and verify the effective package with one command.
How catkin searches for packages
For ROS Melodic and catkin, the overlay rule is:
A workspace sourced later has higher priority.
From lower to higher priority:
Before migrating, you do not need to memorize every path. Answer two questions:
- Which packages does the current task depend on?
- Which workspace do those packages actually come from?
Check the copy currently in effect:
Replace mw_multi with the package you want to check. The output is the path ROS will currently use.
Run rospack find both before and after changing .bashrc or a script, and check whether the path switches to the new workspace.
Migration steps
This is the order I followed. The first few steps address explicit sourcing; step 4 checks the implicit underlay that catkin writes into its setup files at build time.
- Keep one main source chain and retain auxiliary workspaces separately — Put the robot code in the main workspace, such as the consolidated
1raicom_ws. Ifcartographer_wsorcv_bridge_wsis still needed, use it as an auxiliary workspace in the extend chain rather than repeatedly sourcing it alongside the main workspace. Create or select the main workspace and collect the required packages there. Comment out old workspace source lines in.bashrc, keeping only the new main workspace and necessary extensions. Then userospack findto verify important package paths. - Remove manual prepends to ROS_PACKAGE_PATH — Commenting out
sourcelines is often insufficient. A shell or script may contain:This puts old_ws/src first, ahead of the catkin overlay. It affects the session that executed the export and processes launched from that session. Comment out or remove these lines too. Theusernamein the path is a placeholder; substitute your own home directory. - Check sourcing in startup scripts — Editing
.bashrcis not enough. Competition scripts, wrappers around launch commands, andsetup_env.shmay still source the old workspace, so nodes launched through them retain the old chain. Review every entry-point script and make them consistently use the new workspace. - Check whether other workspaces retain the old underlay — When only some workspaces are migrated, remember that
devel/setup.shis a build-time snapshot. catkin records the underlay present in the shell wherecatkin_makeruns. Later,source .../devel/setup.bash --extendcan bring the old chain back. Options include writing asetup_env.shwith an explicit source order, or rebuilding auxiliary workspaces such ascv_bridge_wswith the correct underlay. - Migrate udev serial-port rules — Changing robots or USB ports can change device nodes for the chassis, IMU, and lidar. Copy
config/udev/to the new machine, adjust the rules to the actual ports on the new robot, and reload them.
After changing only .bashrc, rospack find returned the right path, but rosrun from an old script still reported a missing package. The script sourced the old workspace again. Check entry-point scripts and interactive shells together.
How to verify the migration
| Check | How | Expected result |
|---|---|---|
| Package path | rospack find <包名> | A path inside the new workspace |
| Environment | echo $ROS_PACKAGE_PATH | No manually prepended old workspace; empty or otherwise as expected |
| Startup entry points | Search .bashrc and .sh files for source | Only the new workspace and necessary extensions |
| Node startup | roslaunch or preparation on the robot | No package not found errors or wrong package versions |
| Hardware | ls -l /dev/carserial, etc. | Correct udev bindings |
Only after every check passes should you consider archiving or removing the old workspace directories to prevent accidentally sourcing them later.
Summary
Workspace migration is not primarily about copying files. It is about having one runtime overlay chain you can explain: a clear main workspace, auxiliary workspaces extended as needed, and no stale ROS_PACKAGE_PATH entries or old underlays in build-time snapshots. rospack find is a cheap regression check; udev is the hardware step not to forget when switching robots.
If you are consolidating ROS environments across multiple robots, work through the checklist above one item at a time.